
The Easiest No-Knead Bread Recipe

I usually like homemade bread, but honestly, I don’t always have the patience for complicated dough recipes. All that kneading, waiting, measuring, and cleaning up? Not exactly my idea of a relaxing afternoon.
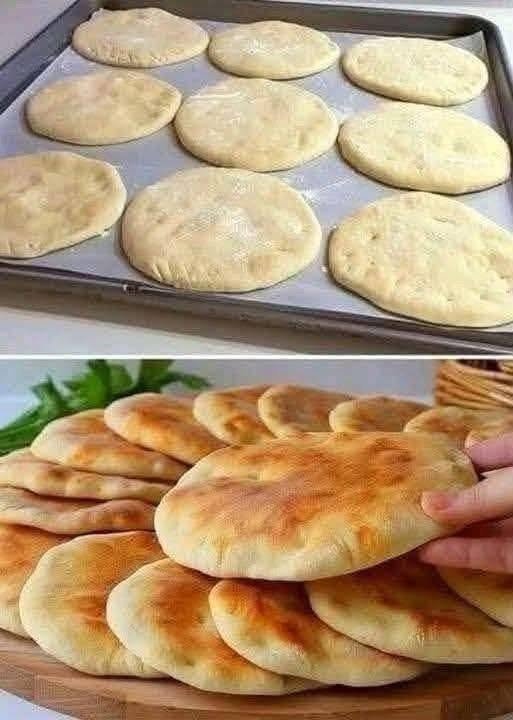
That’s why I love this simple no-knead bread recipe. It doesn’t need eggs or butter, the ingredients are inexpensive, and the dough comes together with very little effort. After rising, the little rounds bake up soft inside with a beautiful golden surface.
It’s the kind of bread I make when I want something homemade without making a big project out of it.
And the best part? You don’t need special equipment or fancy ingredients.
Ingredients
For about 8–10 small flatbreads, you’ll need:
-
3 cups (375 g) all-purpose flour
-
1 teaspoon salt
-
1 tablespoon sugar
-
1 tablespoon instant or active dry yeast
-
1¼ cups (300 ml) warm water
-
2 tablespoons vegetable oil
-
A little extra flour, for shaping
-
A little oil, for greasing the baking tray
A note about the water
The water should be warm, not hot. If it’s too hot, it can interfere with the yeast. Think comfortably warm to the touch.
How to Make This Easy No-Knead Bread
1. Mix the dry ingredients
In a large bowl, combine the flour, salt, sugar, and yeast.
Give everything a quick stir so the yeast and salt are distributed throughout the flour.
2. Add the water and oil
Pour in the warm water and vegetable oil.
Using a wooden spoon, spatula, or even your hand, mix everything together until you have a soft, slightly sticky dough.
Don’t worry about making it perfectly smooth.
That’s the beauty of this recipe—you don’t need to knead it.
3. Let the dough rise
Cover the bowl with plastic wrap, a clean kitchen towel, or a plate.
Leave it somewhere warm for about 1 hour, or until the dough has noticeably expanded and looks puffy.
Depending on the temperature of your kitchen, it may take a little longer.
4. Divide the dough
Lightly flour your work surface.
Turn out the dough and divide it into approximately 8–10 equal pieces.
Roll each piece gently into a ball.
You don’t need to knead the individual pieces. Just shape them enough to make them easy to flatten.
5. Flatten the dough
Using your fingers or a rolling pin, gently flatten each dough ball into a round.
I like them about ½ inch (1–1.5 cm) thick. You can make them thinner if you prefer a flatter, more bread-like texture.
Place the rounds on a lightly greased or parchment-lined baking tray.
6. Give them a short second rise
Cover the shaped dough and let it rest for another 15–20 minutes.
This little rest helps the bread become lighter and softer.
Meanwhile, preheat your oven to 425°F (220°C).
7. Bake until golden
Place the tray in the preheated oven and bake for approximately 12–18 minutes, depending on the thickness of your bread and your oven.
The bread should puff slightly and develop lovely golden-brown patches on top.
Honestly, this is the point where my kitchen starts smelling like a bakery.
8. Keep the bread soft
As soon as the bread comes out of the oven, cover it loosely with a clean kitchen towel for several minutes.
This helps trap some steam and keeps the bread pleasantly soft.
My Best Tips for Soft Homemade Bread
Don’t add too much flour
The dough should be soft and slightly sticky. If you keep adding flour until it’s completely dry, your bread can turn out dense.
Use warm water
Very hot water can damage the yeast. Lukewarm or pleasantly warm water is what you’re after.
Give the dough enough time to rise
If your kitchen is cold, the dough may need more than an hour. Don’t rely only on the clock—look for a dough that has become noticeably puffy.
Don’t overbake
This is probably the easiest way to end up with dry bread. Once the tops are nicely golden and the bread is cooked through, take it out.
Cover the baked bread
I usually cover homemade bread with a clean towel while it cools. It makes a noticeable difference in keeping the crust from becoming too hard.
Make smaller pieces for sandwiches
If you’re planning to use the bread for breakfast or lunch, make the rounds slightly thinner and wider. They work beautifully for sandwiches and wraps.
How to Serve This Homemade Bread
There are so many ways to eat these little breads.
Try them with:
-
Fried or scrambled eggs
-
Cheese and vegetables
-
Hummus
-
Beans or lentils
-
Grilled chicken
-
Soups and stews
-
Curries and gravies
-
Salad
-
Olive oil and herbs
-
Jam or honey
I especially love tearing off a warm piece and using it to scoop up a hearty curry or stew. It’s simple food, but honestly, that’s often the best kind.
How to Store Homemade Bread
Once completely cool, place the bread in an airtight container or food-safe bag.
It should stay soft for around 2–3 days at room temperature.
For longer storage, freeze the cooled bread in a sealed freezer bag. Put parchment paper between pieces if you want to take them out individually.
To serve, simply thaw and warm briefly in the oven, toaster oven, or a dry pan.
Approximate Nutrition Information
Per serving, assuming 10 breads:
-
Calories: ~180
-
Carbohydrates: ~29 g
-
Protein: ~4 g
-
Fat: ~4 g
-
Fiber: ~1 g
-
Sodium: ~230 mg
Nutrition is an estimate and will vary depending on the exact ingredients, flour brand, size of each bread, and amount of oil used.
Frequently Asked Questions
1. Can I make this bread without eggs?
Absolutely. There are no eggs in this recipe. The yeast and simple dough ingredients are enough to give the bread a soft, airy texture.
2. Can I make it without butter?
Yes. This recipe uses vegetable oil instead of butter, so there’s no butter required.
3. Do I really need to knead the dough?
No. That’s what makes this recipe so convenient. Mix the ingredients until a dough forms, let it rise, shape it, and bake.
A little gentle handling while dividing and shaping is all you need.
4. Why did my bread turn out hard?
The most common reasons are adding too much flour, not allowing the dough enough time to rise, or baking it too long.
Also, try covering the bread with a clean towel immediately after baking to help retain moisture.
5. Can I use whole wheat flour?
Yes, although the texture will be heavier and denser. For a softer result, I usually recommend replacing only part of the all-purpose flour with whole wheat flour rather than using 100% whole wheat.
Final Thoughts
If you’ve never made homemade bread before, start with this one.
It’s inexpensive, forgiving, doesn’t require kneading, and uses ingredients that many of us already have in the kitchen. I love recipes like this because they don’t try to make bread complicated.
Once you make it a couple of times, you’ll probably start adjusting it to your own taste—making the rounds thinner, adding herb