
Garlic Herb Artisan Bread Recipe

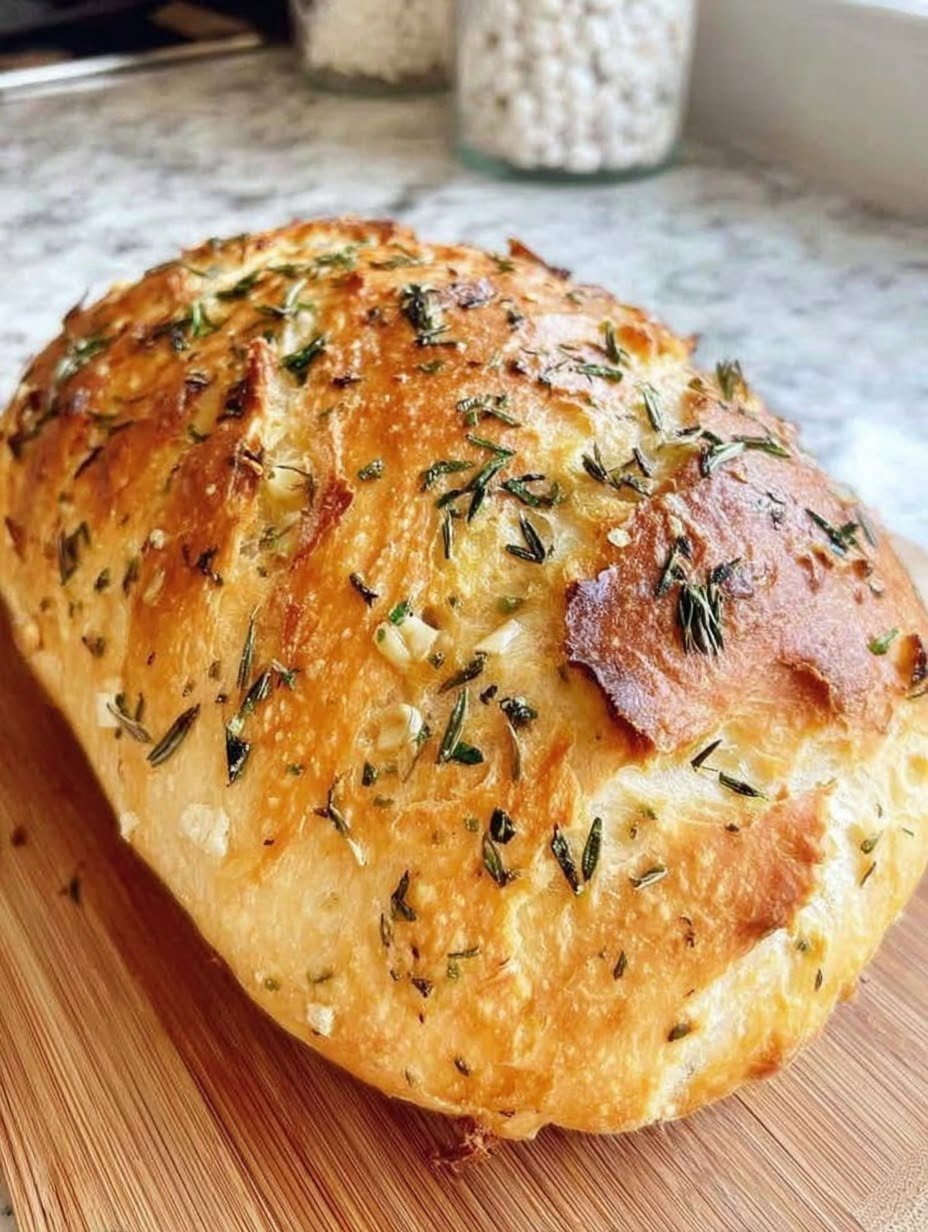
There is something incredibly comforting about homemade bread, especially when it comes out of the oven with a beautifully golden crust, a soft center, and the irresistible smell of garlic and fresh herbs filling the kitchen. Honestly, I think few things can make a home feel cozier than freshly baked bread.
This garlic herb artisan bread is one of those recipes that looks impressive but is surprisingly simple to make. I love the combination of fragrant rosemary, savory garlic, and a lightly crisp crust. The inside stays soft and tender, making every slice perfect for dipping into soup, serving alongside pasta, or enjoying warm with a little butter.
What I especially like about this homemade garlic herb bread is that you don’t need fancy baking equipment or professional baking skills. With a few basic ingredients, a little patience, and some simple techniques, you can make a beautiful loaf right in your own kitchen.
If you’ve always wanted to bake bakery-style artisan bread at home, this is a wonderful recipe to start with. Let’s get baking!
Why You’ll Love This Garlic Herb Bread Recipe
- Easy to make: Simple ingredients and beginner-friendly instructions make this recipe approachable for home bakers.
- Beautiful golden crust: The outside bakes up crisp and golden while the inside stays soft and fluffy.
- Full of flavor: Garlic, rosemary, and other herbs add a delicious savory aroma.
- Perfect for any meal: Serve it with soups, salads, pasta, or your favorite main dishes.
- Great for sharing: This rustic loaf looks lovely on a dinner table or as part of a homemade bread basket.
Preparation and Cooking Time
- Prep time: 20 minutes
- Rising time: 1–2 hours
- Baking time: 30–35 minutes
- Total time: Approximately 2–3 hours
- Yield: 1 medium loaf, about 8 servings
Timing can vary depending on your kitchen temperature and the type of yeast you use.
Ingredients for Garlic Herb Artisan Bread
Here is everything you’ll need to make this delicious homemade loaf.
For the bread dough
- 3 cups (375 g) all-purpose flour or bread flour
- 1 cup plus 2 tablespoons (270 ml) lukewarm water
- 2¼ teaspoons (7 g) instant yeast
- 1 teaspoon sugar or honey
- 1 teaspoon salt
- 1 tablespoon olive oil
For the garlic herb topping
- 3–4 garlic cloves, finely minced
- 2 tablespoons olive oil or melted butter
- 1 tablespoon fresh rosemary, chopped
- 1 tablespoon fresh parsley, chopped
- 1 teaspoon fresh thyme leaves, optional
- ¼ teaspoon freshly ground black pepper
- A small pinch of salt, to taste
Ingredient notes: Fresh rosemary gives this bread its lovely aroma, but dried rosemary works too. Use about 1 teaspoon of dried rosemary in place of 1 tablespoon of fresh rosemary. You can also add a little grated Parmesan cheese if you enjoy a cheesy garlic bread flavor.
How to Make Garlic Herb Artisan Bread
Follow these simple steps for a loaf with a crisp, golden outside and a soft, flavorful center.
Step 1: Activate the yeast
In a large mixing bowl, combine the lukewarm water, sugar, and yeast. Stir gently and let the mixture sit for about 5–10 minutes if you’re using active dry yeast.
The mixture should look slightly foamy. This is a good sign that the yeast is active.
If you’re using instant yeast, you can mix it directly with the flour and add the water afterward.
My tip: Make sure the water is warm rather than hot. Water that’s too hot can damage the yeast and prevent the dough from rising properly.
Step 2: Mix the bread dough
Add the flour, salt, and olive oil to the yeast mixture. Stir everything together until a rough dough forms.
Transfer the dough to a lightly floured surface and knead for about 8–10 minutes, or until it becomes smooth and elastic.
The dough should feel soft and slightly tacky, but it shouldn’t be excessively sticky. If it feels too wet to handle, add flour a tablespoon at a time.
Honestly, I usually prefer a slightly softer dough because it helps create a tender loaf.
Step 3: Let the dough rise
Place the dough in a lightly oiled bowl and turn it once so the surface is coated with oil.
Cover the bowl with a clean kitchen towel or plastic wrap and leave it in a warm spot for about 1–2 hours, or until the dough has roughly doubled in size.
The rising time depends on the temperature of your kitchen. On a warm day, the dough may rise much faster.
Try not to rush this step. Giving the dough enough time to rise helps develop its texture and flavor.
Step 4: Prepare the garlic herb mixture
While the dough rises, mix the minced garlic, olive oil or melted butter, chopped rosemary, parsley, thyme, black pepper, and a pinch of salt in a small bowl.
Stir well so the herbs and garlic are evenly distributed.
I usually save a little fresh rosemary and parsley to sprinkle over the top before baking. It makes the loaf look beautiful and gives it that rustic bakery-style appearance.
Step 5: Shape the loaf
Once the dough has doubled in size, gently press it to release some of the trapped air.
Transfer it to a lightly floured surface and shape it into a round or oval loaf. You can also make a slightly elongated loaf if that fits your baking tray better.
Place the shaped dough on a baking sheet lined with parchment paper.
Cover loosely and let it rest for another 20–30 minutes. This short second rise helps the bread become lighter and softer.
Step 6: Add the garlic and herbs
Brush the surface of the loaf with the garlic herb mixture, distributing the herbs evenly across the top.
Use a sharp knife or bread lame to make one or two shallow cuts across the surface. This gives the bread a rustic appearance and helps control how it expands during baking.
Be gentle when applying the topping so you don’t deflate the dough.
Step 7: Bake until golden brown
Preheat your oven to 400°F (200°C).
Bake the bread for approximately 30–35 minutes, or until the crust is a rich golden brown and the loaf sounds hollow when tapped on the bottom.
If the garlic or herbs begin to brown too quickly, loosely cover the bread with foil for the remaining baking time.
For a more accurate check, the center of a fully baked loaf should generally reach around 200–210°F (93–99°C).
The wonderful aroma of roasted garlic and rosemary will fill your kitchen as the bread bakes. This is usually the point when everyone starts asking when it will be ready!
Step 8: Cool and serve
Remove the bread from the oven and let it cool on a wire rack for at least 20–30 minutes before slicing.
I know it’s tempting to cut into a fresh loaf immediately, but allowing it to cool helps the crumb finish setting. Cutting it too early can make the inside seem gummy.
Once cooled slightly, slice it with a serrated bread knife and serve.
Enjoy it plain, spread with butter, or dipped into olive oil. It’s delicious either way!
Tips for the Best Homemade Garlic Herb Bread
A few simple details can make a big difference in your finished loaf.
1. Use the right water temperature
Lukewarm water helps yeast work effectively. Avoid using very hot water, as excessive heat can damage the yeast.
2. Measure the flour carefully
Too much flour can make bread dense and dry. For the most consistent results, weigh your flour if possible. If measuring with cups, spoon the flour into the cup and level it rather than packing it down.
3. Don’t skip the rising time
Allowing the dough to rise until visibly expanded gives the bread a lighter texture. The dough’s appearance matters more than following an exact number of minutes.
4. Use fresh herbs when possible
Fresh rosemary and parsley provide wonderful flavor and color. Dried herbs are convenient, though their flavor is usually more concentrated, so use smaller amounts.
5. Watch the garlic while baking
Finely minced garlic can brown quickly. If you prefer a milder, sweeter flavor, use roasted garlic or mix the garlic with olive oil before brushing it over the loaf.
6. Create a crispier crust
For a crispier crust, preheat a heavy baking tray or baking stone before placing the loaf in the oven. You can also add steam during the first part of baking by placing a heatproof pan of hot water on a lower rack, following your oven manufacturer’s safety guidance.
7. Let the loaf cool properly
Cooling allows the inside to set and makes slicing much easier. A little patience is worth it!
Common Mistakes to Avoid
- Using water that’s too hot: This can prevent the yeast from working properly.
- Adding too much flour: A stiff dough can produce a heavy loaf.
- Underproofing the dough: Bread baked before it has risen sufficiently may be dense.
- Overloading the topping: Too much wet garlic herb mixture can make the surface greasy and interfere with browning.
- Slicing immediately: Cutting too soon can affect the bread’s texture.
- Baking at the wrong temperature: An oven that’s too cool may leave the crust pale and the inside underbaked.
Delicious Ways to Serve Garlic Herb Artisan Bread
One of the best things about this bread is how easily it fits into different meals.
Serve it with soup
Pair a warm slice with tomato soup, creamy mushroom soup, chicken soup, or vegetable soup. The crust is perfect for soaking up every last bit of broth.
Enjoy it with pasta
Serve this bread alongside spaghetti, creamy Alfredo pasta, lasagna, or baked ziti. It’s especially good with tomato-based sauces.
Make a simple appetizer
Slice the loaf and serve it with olive oil, balsamic vinegar, olives, cheese, and a small bowl of herb butter.
Turn it into garlic toast
Cut the bread into thick slices, brush with a little extra garlic butter, and toast until crisp. Add mozzarella or Parmesan if you want a cheesy variation.
Serve it with salads and grilled dishes
This bread pairs beautifully with fresh green salads, roasted vegetables, grilled chicken, and Mediterranean-style meals.
Enjoy it for breakfast
Toast a slice and spread it with butter, cream cheese, or mashed avocado for a simple savory breakfast.
Variations You Can Try
Once you’ve made the basic recipe, there are plenty of ways to customize it.
- Cheesy garlic herb bread: Add ¼–½ cup grated Parmesan to the topping or sprinkle it over the loaf during the final minutes of baking.
- Rosemary olive bread: Fold chopped olives into the dough for a salty, Mediterranean-inspired flavor.
- Italian herb bread: Replace the rosemary and thyme with a small amount of dried Italian seasoning.
- Roasted garlic bread: Use roasted garlic instead of raw minced garlic for a sweeter, mellower flavor.
- Spicy garlic bread: Add a pinch of red pepper flakes to the herb mixture.
- Butter-rich herb bread: Use melted butter instead of olive oil for a richer taste and softer crust.
How to Store Homemade Garlic Herb Bread
At room temperature: Allow the bread to cool completely, then store it in a bread bag or a suitable airtight container for up to 2 days. Keep it in a cool, dry place.
In the refrigerator: Refrigeration can make bread go stale faster, so I generally avoid it unless the kitchen is unusually hot or humid.
In the freezer: Wrap the completely cooled loaf tightly in plastic wrap or freezer-safe packaging and freeze for up to 2–3 months for best quality.
To reheat: Warm the loaf in a preheated 325°F (165°C) oven for about 8–12 minutes. Frozen slices can be toasted directly from frozen.
Because this recipe uses fresh garlic and herbs on the surface, don’t leave the bread sitting in oil or garlic herb mixtures at room temperature for extended periods. Refrigerate any leftover garlic-in-oil mixture promptly.
Approximate Nutrition Information
The following values are estimates for one serving, assuming the loaf makes 8 servings and using the ingredients listed above.
| Nutrient | Approximate amount per serving |
|---|---|
| Calories | 220–250 kcal |
| Carbohydrates | 38 g |
| Protein | 5–6 g |
| Fat | 5–7 g |
| Saturated fat | 1 g |
| Fiber | 1–2 g |
| Sugar | 1–2 g |
| Sodium | 300–400 mg |
Actual nutrition values will vary depending on the flour, amount of oil or butter, size of each slice, and how much topping remains on the bread.
Frequently Asked Questions
1. Can I make garlic herb artisan bread without a stand mixer?
Absolutely! I usually recommend making this dough by hand if you’re new to bread baking. Mix the ingredients in a large bowl, then knead the dough on a lightly floured surface until smooth and elastic. A stand mixer is convenient but certainly not necessary.
2. Can I use dried herbs instead of fresh herbs?
Yes. Dried rosemary, thyme, parsley, or Italian seasoning can all work. Since dried herbs are more concentrated, start with smaller quantities and adjust to taste. Fresh rosemary is particularly nice for the topping, but dried rosemary still provides plenty of flavor.
3. Why didn’t my bread rise properly?
Several things can cause this, including inactive yeast, water that’s too hot, a cold kitchen, or insufficient rising time. Check that your yeast is fresh and give the dough enough time to rise in a comfortably warm place.
4. Can I prepare the dough ahead of time?
Yes. You can mix the dough, cover it, and let it rise slowly in the refrigerator overnight. The next day, allow it to lose some of its chill, shape it if necessary, let it rise until puffy, add the garlic herb topping, and bake. The timing may vary depending on how cold the dough becomes.
5. How do I know when garlic herb bread is fully baked?
The crust should be golden brown, and the loaf should sound hollow when tapped on the bottom. For an additional check, use an instant-read thermometer to confirm that the center reaches approximately 200–210°F (93–99°C). If the crust browns before the center is ready, loosely cover it with foil and continue baking.