
Easy Homemade Seeded Bread Recipe

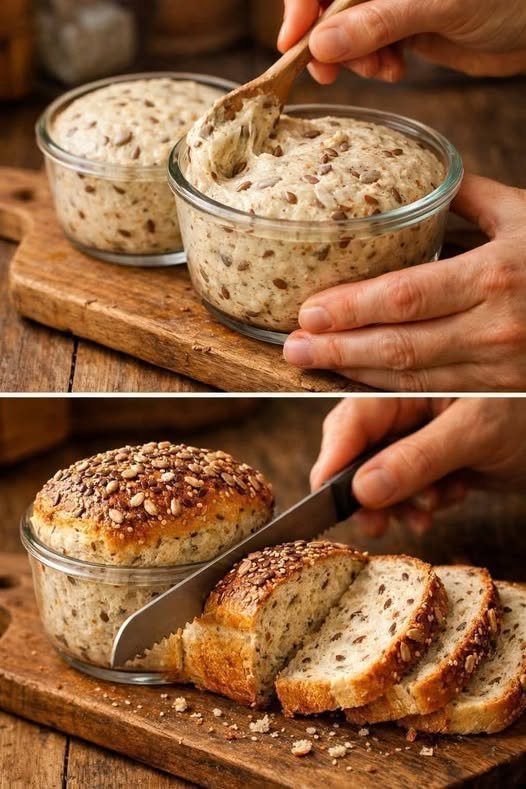
There is something incredibly satisfying about making fresh bread at home. Honestly, the smell of freshly baked bread coming out of the oven is one of my favorite things in the kitchen!
This homemade seeded bread recipe is perfect if you love bread with a little extra texture and flavor. It has a beautifully golden crust covered with crunchy seeds and a soft, tender inside filled with delicious nutty goodness.
I usually enjoy making this bread when I want something homemade that feels a little more special than regular store-bought bread. The combination of sunflower seeds, flaxseeds, sesame seeds, and pumpkin seeds gives every slice a lovely crunch.
The best part? You don’t need complicated ingredients or professional baking equipment. With a little patience and some simple preparation, you can make a delicious homemade multiseed bread that your whole family will enjoy.
Whether you serve it toasted with butter, use it for sandwiches, or enjoy it alongside your favorite soup, this bread is sure to become a regular in your kitchen.
Why You’ll Love This Homemade Seeded Bread
- Soft and fluffy texture: The inside stays tender while the outside develops a delicious crust.
- Nutty flavor: A mixture of seeds adds wonderful flavor to every bite.
- Simple ingredients: You can make it with everyday baking ingredients.
- Perfect for meal preparation: Bake a loaf ahead of time and enjoy it throughout the week.
- Versatile: It tastes delicious with sweet and savory toppings.
Ingredients You’ll Need
Here is everything you need to make this delicious homemade multiseed bread.
For the bread dough
- 3 cups all-purpose flour or bread flour
- 1 cup lukewarm water
- 2 teaspoons instant yeast
- 1 tablespoon honey or sugar
- 1 teaspoon salt
- 2 tablespoons olive oil
- ¼ cup sunflower seeds
- 2 tablespoons flaxseeds
- 2 tablespoons pumpkin seeds
- 1 tablespoon sesame seeds
For the topping
- 1 tablespoon sunflower seeds
- 1 tablespoon pumpkin seeds
- 1 tablespoon sesame seeds
- 1 teaspoon flaxseeds
- A little water or milk for brushing
How to Make Homemade Seeded Bread
Follow these simple steps to make a beautiful, golden loaf with a soft interior and crunchy seed topping.
Step 1: Prepare the yeast mixture
Start by adding lukewarm water to a large mixing bowl. Stir in the honey or sugar and instant yeast.
Let the mixture sit for about 5 minutes if you’re using active dry yeast. Instant yeast can be mixed directly with the flour.
Make sure the water is warm rather than hot, as excessively hot water can damage the yeast.
Step 2: Mix the dry ingredients
In another bowl, combine the flour and salt.
Add the sunflower seeds, flaxseeds, pumpkin seeds, and sesame seeds. Give everything a good mix so the seeds are evenly distributed.
I usually like adding a little extra sunflower and pumpkin seeds because they give the bread a lovely nutty texture.
Step 3: Prepare the dough
Add the flour mixture to the yeast mixture.
Pour in the olive oil and mix everything until a soft, slightly sticky dough forms.
Knead the dough for approximately 8–10 minutes by hand or 5–7 minutes using a stand mixer.
The dough should feel soft and elastic. Avoid adding too much extra flour, as this can make the finished bread dry.
Step 4: Let the dough rise
Transfer the dough to a lightly greased bowl.
Cover it with a clean kitchen towel or plastic wrap and leave it in a warm place for approximately 60–90 minutes, or until doubled in size.
Honestly, this is the part where patience makes all the difference. Giving the dough enough time to rise helps create a lighter, fluffier texture.
Step 5: Shape the bread
Once the dough has risen, gently press it to release excess air.
Shape it into a round loaf or an oval loaf, depending on your preference.
Place it into a greased loaf pan or an oven-safe baking dish lined with parchment paper.
Step 6: Add the seed topping
Lightly brush the top of the dough with water or milk.
Sprinkle the remaining sunflower seeds, pumpkin seeds, sesame seeds, and flaxseeds over the surface.
Gently press the seeds into the dough so they stick during baking.
For an extra attractive finish, I like mixing different seeds rather than using just one type.
Step 7: Allow a second rise
Cover the shaped dough loosely and let it rise again for approximately 30–45 minutes.
It should look slightly puffed and airy.
Meanwhile, preheat your oven to 190°C (375°F).
Step 8: Bake until golden
Place the bread in the preheated oven and bake for approximately 30–40 minutes.
The top should turn a beautiful golden brown, and the loaf should sound hollow when tapped underneath.
If the seeds begin browning too quickly, loosely cover the bread with aluminum foil.
Step 9: Cool and slice
Remove the bread from the oven and allow it to cool in the pan for around 10 minutes.
Transfer it to a wire rack and let it cool completely before slicing.
I know it’s tempting to cut into freshly baked bread immediately, but allowing it to cool helps the inside set properly.
Now your homemade seeded bread is ready to enjoy!
Tips for Making the Best Seeded Bread
A few simple tricks can make a big difference in your baking results.
1. Use lukewarm water
Water that is too hot can affect yeast activity. Aim for comfortably warm water.
2. Don’t overload the dough with seeds
Seeds add flavor and texture, but adding too many can make the dough heavy and affect its rise.
3. Give the dough enough rising time
Allowing the dough to rise properly helps create a soft and airy crumb.
4. Use fresh yeast
Check the expiration date on your yeast to make sure it is still active.
5. Experiment with different seeds
You can use chia seeds, poppy seeds, sesame seeds, pumpkin seeds, or sunflower seeds depending on what you have available.
6. Let the bread cool completely
This helps prevent a gummy texture when slicing.
7. Use an oven-safe baking dish
If you want a round loaf like the one pictured, choose a baking dish specifically labeled as oven-safe. Never put an ordinary glass serving bowl in the oven.
Serving Suggestions
One of the best things about homemade seeded bread is how many ways you can enjoy it.
Here are some of my favorite serving ideas:
- With butter: Spread a little butter over a warm slice for a simple and delicious snack.
- With honey: Add honey for a naturally sweet breakfast.
- With avocado: Top toasted bread with mashed avocado, salt, and black pepper.
- For sandwiches: Use it to make delicious vegetable, chicken, or cheese sandwiches.
- With eggs: Serve alongside scrambled, boiled, or fried eggs.
- With soup: Pair it with creamy mushroom soup, tomato soup, or vegetable soup.
- With cheese: Enjoy it with cream cheese or your favorite spread.
My personal favorite is a lightly toasted slice topped with butter and a little honey. It’s simple, comforting, and absolutely delicious!
Storage Instructions
At room temperature: Store the completely cooled bread in an airtight container or bread bag for up to 2–3 days.
In the refrigerator: You can refrigerate it for approximately 5–7 days, although refrigeration may make homemade bread dry faster.
In the freezer: Slice the bread and freeze it in a freezer-safe bag for up to 2–3 months for best quality.
To enjoy frozen slices, simply toast them directly from frozen or allow them to thaw at room temperature.
Approximate Nutrition Information
The following nutrition information is an estimate based on 12 slices per loaf.
| Nutrient | Per serving |
|---|---|
| Calories | 175 kcal |
| Carbohydrates | 27 g |
| Protein | 6 g |
| Fat | 5 g |
| Fiber | 3 g |
| Sugar | 2 g |
| Sodium | 200 mg |
Nutrition values are approximate and will vary depending on the flour, seeds, and exact quantities used.
Frequently Asked Questions
1. Can I use whole wheat flour instead of all-purpose flour?
Yes! You can replace some or all of the all-purpose flour with whole wheat flour. However, whole wheat flour absorbs more water and produces a denser loaf. You may need to adjust the liquid slightly.
2. Why is my homemade seeded bread dense?
Dense bread can happen when the dough hasn’t risen enough, the yeast is inactive, or too much flour has been added. Make sure your yeast is fresh and give the dough enough time to rise.
3. Can I prepare seeded bread without kneading?
Yes! You can use a no-knead version with a wetter dough and a longer resting period. The texture and preparation method will be slightly different, but it can still produce delicious homemade bread.
4. Can I add oats to this bread recipe?
Absolutely! You can add a small amount of rolled oats to the dough or sprinkle them over the top. If adding a large amount, adjust the liquid as needed to maintain a soft dough.
5. How do I keep homemade seeded bread soft?
Allow the bread to cool completely before storing it in an airtight bread bag or container. Avoid leaving it uncovered for long periods, as exposure to air can dry it out.