
Healthy Tuna Melts!

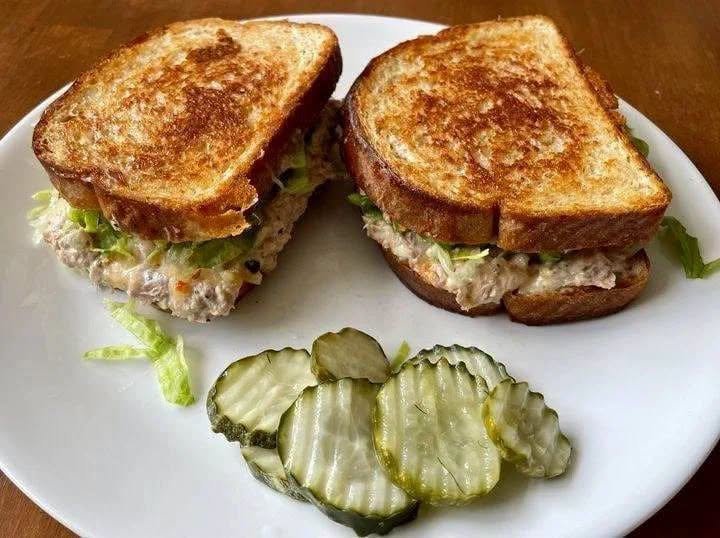
Healthy Tuna Melts
There are some lunches that feel like pure comfort food while still being easy enough for a busy day, and these Healthy Tuna Melts are one of my favorites. I first started making them when I wanted something more satisfying than a regular tuna sandwich but didn’t want a heavy meal.
Last weekend, I made these for my family with whole-grain bread, crunchy vegetables, creamy Greek yogurt, and plenty of melted cheese. The sandwiches came out golden and crisp on the outside, while the tuna filling was creamy, fresh, and packed with flavor. Everyone loved them, and one of my family members immediately asked if we could have them again the following week.
Now, I make these whenever I need a quick lunch or an easy dinner after a busy day. They’re especially good with a simple cucumber-tomato salad or a bowl of vegetable soup.
If you love classic tuna melts but want a lighter, fresher version, this recipe is definitely worth saving.
Why You’ll Love This Recipe
- High in protein
- Lighter than a traditional tuna melt
- Creamy without being overly heavy
- Crispy, golden bread
- Ready in about 20 minutes
- Easy family-friendly meal
Ingredients
Tuna Filling
- 2 cans tuna in water, drained
- ¼ cup plain Greek yogurt
- 1 tablespoon mayonnaise
- 1 tablespoon fresh lemon juice
- 1 tablespoon finely diced red onion
- 2 tablespoons finely diced celery
- 2 tablespoons diced cucumber
- 1 tablespoon chopped fresh parsley
- 1 teaspoon Dijon mustard
- ¼ teaspoon garlic powder
- Salt and black pepper, to taste
For the Melts
- 8 slices whole-grain bread
- 4 slices reduced-fat cheddar or mozzarella cheese
- 1 tablespoon olive oil or softened butter
Optional Additions
- Sliced tomato
- Baby spinach
- Avocado
- Pickled jalapeños
- Fresh dill
Instructions
Step 1: Make the Tuna Filling
Add the drained tuna to a bowl and gently flake it with a fork.
Add Greek yogurt, mayonnaise, lemon juice, red onion, celery, cucumber, parsley, Dijon mustard, garlic powder, salt, and pepper.
Mix until creamy and well combined.
Step 2: Assemble the Sandwiches
Spread the tuna mixture evenly over four slices of bread.
Top each with a slice of cheese.
Add tomato or spinach if desired.
Place the remaining bread slices on top.
Lightly brush the outside of each sandwich with olive oil or softened butter.
Step 3: Cook
Heat a nonstick skillet over medium-low heat.
Place the sandwiches in the skillet and cook for about 3–4 minutes per side, gently pressing with a spatula.
Cook until the bread is golden and crispy and the cheese is completely melted.
Step 4: Serve
Remove from the skillet and let the sandwiches rest for about 1 minute.
Slice in half and serve warm with a fresh salad, vegetable soup, or sliced cucumbers.
Air Fryer Method
You can also make these in the air fryer.
Preheat to 375°F (190°C).
Place the assembled sandwiches in the basket and cook for 4–6 minutes, flipping halfway through, until golden and the cheese is melted.
Tips
- Drain the tuna well so the filling isn’t watery.
- Greek yogurt adds creaminess while keeping the filling lighter.
- Use freshly grated or sliced cheese for better melting.
- Cook over medium-low heat so the bread doesn’t brown before the cheese melts.
- Add fresh lemon juice for a brighter flavor.
Mediterranean-Inspired Variation
For a Mediterranean twist, add:
- Chopped Kalamata olives
- Diced roasted red peppers
- Fresh oregano
- Crumbled feta
- Chopped cucumber
- A drizzle of extra virgin olive oil
Serve with a Greek salad for a complete Mediterranean-style meal.
Storage
The tuna mixture can be stored in an airtight container in the refrigerator for up to 3 days.
For the best texture, assemble and toast the sandwiches just before serving.
Prep Time
10 minutes
Cook Time
8 minutes
Total Time
18 minutes
Servings
4 sandwiches
Nutrition (Approximate Per Sandwich)
- Calories: 360
- Protein: 29g
- Carbohydrates: 32g
- Fat: 14g
- Fiber: 5g
- Sugar: 4g
- Sodium: 650mg
Frequently Asked Questions
Can I use canned tuna in oil?
Yes. Tuna packed in water keeps the recipe lighter, but tuna in olive oil can add extra richness. Drain it well before mixing.
Can I make the tuna filling ahead of time?
Absolutely. Prepare it up to 3 days ahead and keep it refrigerated. Assemble and toast the melts when you’re ready to eat.
What cheese works best?
Cheddar, mozzarella, Swiss, provolone, or Monterey Jack all melt beautifully. A combination of cheddar and mozzarella is especially delicious.
Can I make these without mayonnaise?
Yes. Replace the mayonnaise with additional Greek yogurt, mashed avocado, or hummus.
Are Healthy Tuna Melts good for meal prep?
The tuna filling is excellent for meal prep. Keep the filling refrigerated and toast the sandwich fresh for the best crispy texture.
What should I serve with tuna melts?
Try a cucumber-tomato salad, leafy green salad, roasted vegetables, vegetable soup, or a small bowl of fresh fruit for a balanced meal.