
Easy Homemade Bread Recipe

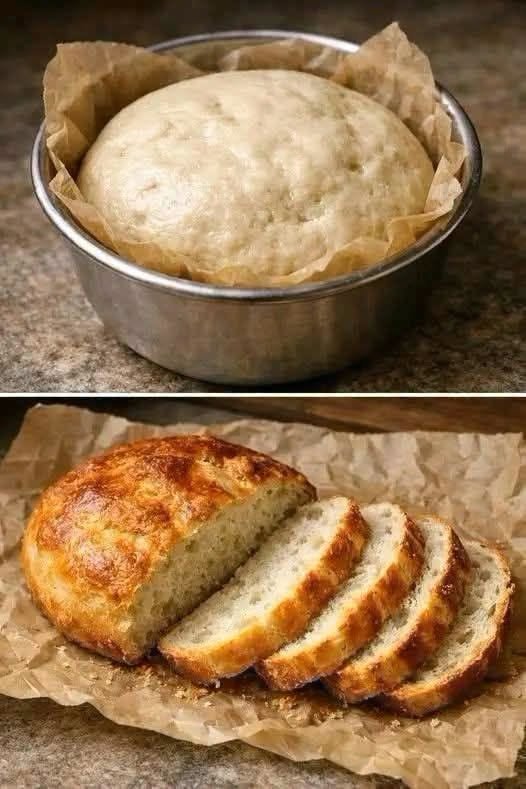
This easy air fryer bread recipe has become one of those recipes I make almost without thinking. The ingredients are cheap and basic, the preparation is surprisingly simple, and the result is a beautifully golden loaf with a soft, fluffy middle.
I usually make a loaf when I know we’ll need bread for breakfast or sandwiches over the next couple of days. There’s something pretty satisfying about slicing into a warm homemade loaf instead of opening a plastic bread bag from the store.
And if you don’t have a full-size oven, even better — you can make homemade bread right in your air fryer.
Why You’ll Love This Air Fryer Bread
-
No conventional oven needed
-
Uses simple, inexpensive ingredients
-
No fancy bread machine required
-
Great for beginners
-
Soft inside with a golden crust
-
Perfect for toast, sandwiches, or dipping into soup
-
Much cheaper than buying fresh bread regularly
Ingredients
For one small-to-medium loaf:
-
3 cups (375 g) all-purpose flour
-
1 teaspoon salt
-
1 tablespoon sugar
-
2 teaspoons instant or active dry yeast
-
1 tablespoon vegetable oil or olive oil
-
1 to 1¼ cups (240–300 ml) warm water
-
1 tablespoon melted butter, optional, for brushing the top
A quick note about the water
Don’t add all the water at once. Start with about 1 cup and add more gradually if the dough feels too dry.
You want a soft, slightly tacky dough, not something stiff and crumbly.
How to Make Bread in an Air Fryer
1. Mix the dry ingredients
In a large bowl, combine the flour, salt, sugar, and yeast.
Give everything a good stir so the yeast and salt are evenly distributed.
If you’re using active dry yeast rather than instant yeast, you can first mix it with the warm water and sugar and let it sit for about 5–10 minutes until slightly foamy.
2. Add the water and oil
Pour in the warm water and oil.
Start stirring with a wooden spoon or spatula. The dough will look shaggy at first, which is completely normal.
If it seems very dry, add another tablespoon of water at a time.
Honestly, don’t worry about making the dough look perfect at this stage.
3. Knead the dough
Turn the dough onto a lightly floured surface and knead for around 5–8 minutes.
You’re looking for dough that becomes smoother and stretchy.
If it sticks terribly to your hands, sprinkle on a tiny amount of flour. Try not to add too much, though — too much flour can make the finished bread dense.
4. Let the dough rise
Place the dough in a lightly oiled bowl and cover it with a clean kitchen towel or plastic wrap.
Leave it somewhere warm for about 1 hour, or until it has roughly doubled in size.
Depending on the temperature of your kitchen, this could take a little longer.
I usually use the “double in size” test rather than watching the clock.
5. Shape the loaf
Once the dough has risen, gently press out some of the excess air.
Shape it into a round loaf that will comfortably fit inside your air fryer.
Line a small heat-safe cake pan, loaf pan, or suitable baking dish with parchment paper if needed.
Place the dough inside.
Don’t make the loaf too large — remember that it will expand as it cooks.
6. Let it rise again
Cover the shaped dough and let it rest for another 20–30 minutes.
This second rise helps give the bread a lighter, softer texture.
While it rests, preheat your air fryer to 160°C (320°F) for about 3–5 minutes, if your model requires preheating.
7. Air fry the bread
Place the dough carefully into the air fryer basket.
Cook at 160°C (320°F) for approximately 25–30 minutes.
Because air fryers vary quite a bit, start checking around the 20–25 minute mark.
The loaf should be nicely browned on top and sound hollow when you gently tap the bottom.
If the top is browning too quickly while the inside still needs cooking, loosely cover the loaf with foil and continue cooking.
Important: Make sure any pan, parchment paper, and foil you use are suitable for your particular air fryer and are secured so they cannot contact the heating element.
8. Let it cool before slicing
This is probably the hardest part.
I know it’s tempting to cut straight into a hot loaf, but let it cool for at least 20–30 minutes first.
The inside continues setting as it cools. Cutting too soon can make the crumb look gummy or compressed.
Once cooled, slice and enjoy!
My Best Tips for Air Fryer Bread
Don’t use water that’s too hot
Very hot water can damage or kill the yeast. The water should feel comfortably warm, not hot.
Don’t overload the dough with flour
A slightly sticky dough is usually better than a dry, stiff one. Add flour gradually while kneading.
Check your air fryer early
Every air fryer cooks a little differently. Some are much more powerful than others, so your loaf may finish several minutes earlier or later.
Watch the crust
Air fryers circulate hot air directly around the food, so bread can brown surprisingly quickly.
If the crust looks perfect but the center isn’t done, loosely cover the top with foil.
Give the bread room
Don’t shape a huge loaf that fills the entire basket. The dough needs room to expand.
Cool it properly
I know. It’s homemade bread. You want to eat it immediately.
But giving it time to cool makes a noticeable difference to the texture.
How to Know When Your Air Fryer Bread Is Done
The easiest signs are:
-
The crust is golden brown.
-
The loaf feels firm rather than doughy.
-
The bread sounds hollow when tapped.
-
The center is no longer wet or gummy.
If you have an instant-read thermometer, the center of a basic loaf is generally done around 93–99°C (200–210°F).
What to Serve With Homemade Air Fryer Bread
This bread is incredibly versatile.
I usually slice it for:
-
Butter and jam at breakfast
-
Fried or scrambled eggs
-
Grilled cheese sandwiches
-
Chicken or tuna sandwiches
-
Avocado toast
-
Peanut butter and banana
-
Soup and stew
-
Garlic bread
-
Toast with honey
-
Simple cheese sandwiches
And honestly, a warm slice with butter is sometimes all you need.
How to Store Homemade Bread
Once completely cool, keep the bread in an airtight container or bread bag at room temperature.
It is best enjoyed within 2–3 days.
For longer storage, slice the loaf and freeze the slices in a freezer-safe bag. You can take out individual slices whenever you need them and toast them straight from frozen.
Approximate Nutrition Information
Per serving, assuming the loaf is divided into 10 slices.
-
Calories: ~165 kcal
-
Carbohydrates: ~31 g
-
Protein: ~5 g
-
Fat: ~3 g
-
Fiber: ~1 g
-
Sugar: ~1 g
-
Sodium: ~235 mg
Nutrition will vary depending on the exact flour, oil, serving size, and other ingredients used.
Frequently Asked Questions
1. Can I make bread in any air fryer?
Most air fryers can handle bread, provided you have enough room for the dough and use a suitable heat-safe pan or baking dish if required. Always check your air fryer’s instructions regarding cookware and parchment paper.
2. Why is my air fryer bread raw in the middle?
The outside can brown much faster than the center. If this happens, reduce the temperature slightly and continue cooking. A smaller or flatter loaf will also cook more evenly.
3. Can I use whole wheat flour?
Yes. You can replace some of the all-purpose flour with whole wheat flour. For a softer loaf, I recommend starting with about 25–50% whole wheat flour rather than replacing all of it.
4. Can I make this bread without kneading?
You can. A no-knead version can be made by mixing the dough and allowing it to rest for several hours before shaping and cooking. The texture will be somewhat different, but it can still make excellent homemade bread.
5. Can I make this air fryer bread ahead of time?
Absolutely. I actually prefer making it a few hours ahead so it has plenty of time to cool. You can also freeze the sliced bread and toast individual slices whenever you want.
Final Thoughts
If you’ve never tried making bread in an air fryer, this is such a good recipe to start with.
It’s inexpensive, doesn’t require complicated equipment, and once you’ve made it a couple of times, the whole process becomes really straightforward. I usually mix the dough, let it rise while I’m doing other things, shape it, and let the air fryer handle the rest.
And that’s probably my favorite thing about this recipe: you don’t need to be an expert baker to make a really good loaf of bread at home.