
Easy No-Knead Artisan Bread Recipe

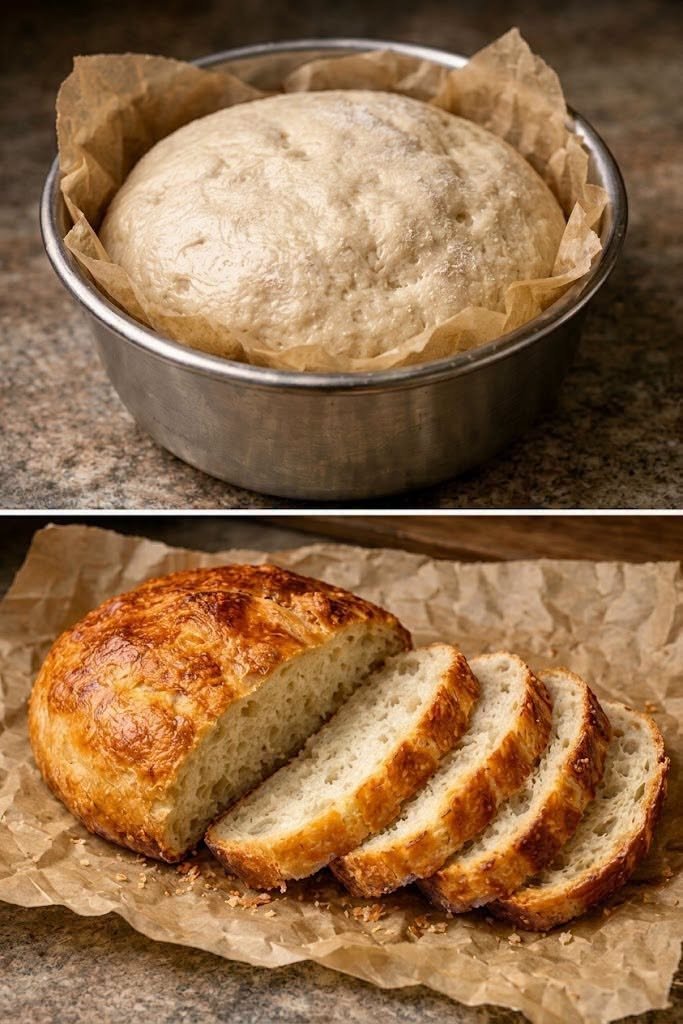
There is something so comforting about the smell of freshly baked bread filling the kitchen. Honestly, homemade bread is one of those simple pleasures that makes an ordinary day feel special. And the best part? You don’t need a fancy bread machine or years of baking experience to make a beautiful loaf!
This Easy No-Knead Artisan Bread has a golden, crispy crust and a soft, chewy interior with lovely air pockets. The dough does most of the work while it rests, allowing the yeast to develop flavor without hours of kneading.
I usually love making this bread when I want something homemade to serve with soup, pasta, or a simple breakfast. The ingredients are basic pantry staples, and the method is straightforward enough for beginners.
If you’ve ever been nervous about baking bread from scratch, this recipe is a wonderful place to start. With a little patience and a hot oven, you can enjoy bakery-style bread right at home!
Ingredients
Servings: 8–10 slices
Prep Time: 10–15 minutes
Resting Time: 2–3 hours, or longer for a slower rise
Cook Time: 35–45 minutes
Total Time: Approximately 3–4 hours
- 3 cups (375 g) all-purpose flour or bread flour
- 1½ teaspoons salt
- 1 teaspoon instant yeast
- 1½ cups (360 ml) lukewarm water
- 1 teaspoon sugar, optional
- 1 tablespoon olive oil, optional, for a slightly softer crumb
- Extra flour, for dusting
Optional egg wash: 1 egg beaten with 1 tablespoon water, for a shiny, golden crust.
Note: Traditional artisan bread usually doesn’t need egg wash. For the rustic appearance shown in the picture, you can simply bake the loaf without it.
Step-by-Step Method
Step 1: Mix the Dry Ingredients
In a large mixing bowl, combine the flour, salt, and instant yeast. If you’re using sugar, add it now.
Give everything a quick stir so the yeast and salt are evenly distributed.
Step 2: Add the Water
Pour in the lukewarm water and olive oil, if using. Stir with a wooden spoon until a rough, sticky dough forms.
The dough should look shaggy and slightly wet rather than smooth. That’s perfectly fine! You don’t need to knead it.
If the dough seems unusually dry, add a teaspoon of water at a time. If it’s very runny, sprinkle in a little extra flour.
Step 3: Let the Dough Rise
Cover the bowl with plastic wrap, a lid, or a clean kitchen towel.
Leave it in a warm, draft-free place for approximately 2–3 hours, or until it has risen noticeably and looks bubbly.
For a deeper flavor, you can refrigerate the dough for 8–12 hours or overnight after the initial mixing. Allow it to warm slightly before shaping.
Step 4: Shape the Bread
Lightly flour your work surface and turn the dough out onto it.
With floured hands, gently fold the edges of the dough toward the center several times to form a round loaf. Avoid pressing out too much air.
Place the dough seam-side down on parchment paper. Cover loosely and let it rest for another 20–30 minutes while you preheat the oven.
Step 5: Preheat the Oven
Place a Dutch oven with its lid inside your oven and preheat to 450°F (230°C) for about 30 minutes.
Preheating the pot helps create the hot, steamy environment needed for a crisp artisan crust.
Safety tip: A preheated Dutch oven becomes extremely hot. Use oven mitts and handle it carefully.
Step 6: Transfer the Dough to the Pot
Carefully remove the hot Dutch oven from the oven.
Lift the dough using the parchment paper and lower it into the pot. If desired, score the top with a sharp bread lame or knife to help the loaf expand while baking.
Cover with the lid and return the pot to the oven.
Step 7: Bake Until Golden
Bake covered for 30 minutes. The trapped steam helps the loaf rise and develop a crisp crust.
Remove the lid and bake for another 10–15 minutes, or until the crust is deep golden brown.
If you’re using an egg wash for a shinier finish, brush it on immediately before baking, although it will give the bread a less traditional artisan appearance.
Step 8: Cool Before Slicing
Carefully transfer the loaf to a wire rack and let it cool for at least 45–60 minutes before slicing.
I know it’s tempting to cut into warm bread right away, but letting it cool helps the inside finish setting and prevents a gummy texture.
Once cooled, slice it with a serrated bread knife and enjoy!
Cooking Tips for Perfect Homemade Artisan Bread
1. Measure the Flour Correctly
Too much flour can make the bread dense. For the most consistent results, weigh the flour using a kitchen scale.
2. Use Lukewarm Water
Water that’s comfortably warm to the touch is ideal. Very hot water can damage the yeast and prevent the dough from rising properly.
3. Don’t Worry About Sticky Dough
No-knead bread dough is naturally sticky. Resist the urge to add too much extra flour, as this can make the finished loaf heavy.
4. Give the Dough Enough Time
The rising time depends on room temperature and yeast activity. Look for a noticeably risen, bubbly dough rather than relying only on the clock.
5. Preheat Your Dutch Oven
A thoroughly heated pot helps create the crusty exterior and airy texture that make artisan bread so delicious.
6. Don’t Skip the Cooling Time
Cooling allows the crumb to set properly. Cutting too early can make the bread seem underbaked inside even when it’s fully cooked.
7. Try Different Flavors
Add chopped rosemary, roasted garlic, dried herbs, or a little grated cheese for a flavorful variation.
Serving Suggestions
This homemade artisan bread is incredibly versatile. Here are some of my favorite ways to enjoy it:
- With butter: Spread softened butter over a warm slice for a simple, comforting treat.
- With soup: Serve alongside tomato soup, creamy mushroom soup, or vegetable soup.
- For sandwiches: Use thick slices for grilled cheese or fresh vegetable sandwiches.
- With olive oil: Dip pieces into olive oil mixed with herbs and black pepper.
- At breakfast: Toast slices and top with jam, honey, or scrambled eggs.
- Alongside pasta: Serve with spaghetti, lasagna, or creamy pasta dishes to soak up the sauce.
- As garlic bread: Brush slices with garlic butter and toast until lightly crisp.
You can also turn leftover bread into croutons or breadcrumbs, so nothing goes to waste.
Storage and Freezing Tips
Room temperature: Store the completely cooled loaf in a paper bag or bread box for up to 2 days for the best crust. A sealed container helps prevent drying but will soften the crust.
Refrigeration: Refrigeration generally makes bread go stale faster, so it’s best avoided unless necessary.
Freezing: Slice the cooled bread, place it in a freezer-safe bag, and freeze for up to 3 months for best quality. Toast slices directly from frozen or thaw at room temperature.
Refreshing the crust: Warm the loaf in a 350°F (175°C) oven for approximately 5–10 minutes to help restore some crispness.
Nutrition Information
Approximate nutrition per serving, based on 10 slices:
- Calories: 140
- Protein: 4 g
- Carbohydrates: 29 g
- Fat: 1 g
- Fiber: 1 g
- Sugar: Less than 1 g
- Sodium: 350 mg
Nutrition values are estimates and may vary depending on the flour, serving size, and optional ingredients used.
Frequently Asked Questions
1. Can I make no-knead artisan bread without a Dutch oven?
Yes! You can bake the loaf on a preheated baking sheet or baking stone. To help develop a crust, place a separate oven-safe pan on the lower rack and carefully add hot water to create steam at the beginning of baking. Avoid pouring water onto the oven floor or onto glass.
2. Why didn’t my bread dough rise?
The yeast may be old, the water may have been too hot, or the room may be too cold. Give the dough additional time in a comfortably warm place and check that your yeast is active.
3. Can I use whole wheat flour instead of all-purpose flour?
Yes, but whole wheat flour absorbs more water and produces a denser loaf. For beginners, try replacing ½–1 cup of the all-purpose flour with whole wheat flour and adjust the water if necessary.
4. How do I get a crispy crust like bakery bread?
Use a properly preheated Dutch oven, bake with the lid on for the first part of cooking, and remove the lid to brown the crust. Let the bread cool uncovered on a wire rack.
5. Can I prepare the dough the night before?
Absolutely! Mix the dough, cover it, and refrigerate it overnight for a slower fermentation and more developed flavor. The next day, shape the dough, allow it to rest until slightly puffy, and bake as directed. Depending on the dough’s temperature and activity, it may need extra time before baking.