
Delicious Crispy Chips

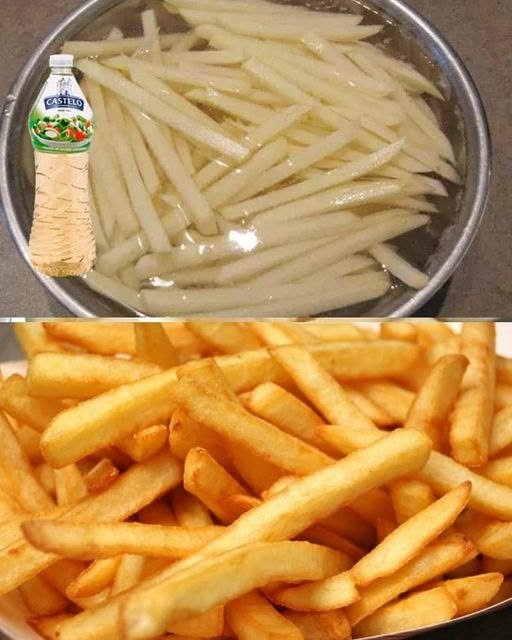
Have you ever craved a big plate of golden, crispy chips but wanted to skip the extra oil? Honestly, I know the feeling! Homemade chips are one of those simple comfort foods that everyone loves, whether you’re serving them with burgers, enjoying them as an afternoon snack, or putting together a quick family dinner.
I usually make potato chips the traditional way, but I wanted to find an easier method that gives me that lovely crispy outside and soft, fluffy center without deep-frying. The secret is surprisingly simple: soak the cut potatoes in cold water, remove the excess starch, dry them thoroughly, and cook them at a high temperature with plenty of space around each piece.
No deep fryer, no pouring oil into a pan, and no complicated ingredients are needed. With a little patience and the right cooking technique, you can enjoy delicious homemade chips with little to no added fat.
If you’ve been looking for an easy oil-free chips recipe, this is one worth trying!
Why You’ll Love These Oil-Free Crispy Chips
- No added oil: Enjoy homemade chips without adding cooking oil.
- Simple ingredients: All you need are potatoes, water, and your favorite seasonings.
- Crispy and fluffy: The outside becomes golden while the inside stays tender.
- Easy to customize: Add paprika, black pepper, garlic powder, or your favorite herbs.
- Perfect for everyday meals: Serve them with sandwiches, burgers, wraps, or homemade dips.
Ingredients You’ll Need
This recipe makes approximately 3 servings.
- 500 g (about 1.1 lb) potatoes, preferably a floury variety such as Russet
- Cold water, enough to cover the potatoes
- ½ teaspoon salt, or to taste
- ½ teaspoon paprika (optional)
- ¼ teaspoon garlic powder (optional)
- Black pepper, to taste
The secret ingredient? There isn’t really a special ingredient. The trick is removing excess surface starch and moisture before cooking. That’s what helps the potatoes develop a better texture.
Step-by-Step Method for Crispy Oil-Free Chips
Step 1: Choose and Cut the Potatoes
Wash and peel the potatoes if you prefer them without skin. I usually cut them into evenly sized sticks, roughly 1 cm thick, so they cook at a similar rate.
Try not to make some pieces very thick and others extremely thin. Uneven pieces can cook at different speeds, leaving you with a mixture of soft and overly browned chips.
Step 2: Soak the Potato Sticks
Place the cut potatoes in a large bowl and cover them with cold water.
Let them soak for 30 minutes. This helps remove some of the excess surface starch, which can contribute to sticking and uneven browning.
If you have a little extra time, you can soak them for up to an hour. After soaking, drain the water and rinse the potatoes once more.
Step 3: Dry Them Really Well
This is one of the most important steps!
Spread the potato sticks over a clean kitchen towel or paper towels and pat them completely dry. Give them a few minutes to air-dry if necessary.
Honestly, I wouldn’t rush this part. Wet potatoes tend to steam rather than crisp, so removing as much surface moisture as possible makes a noticeable difference.
Step 4: Preheat the Oven
Preheat your oven to 220°C (425°F), or approximately 200°C (400°F) for a fan-assisted oven.
Line a large baking tray with baking parchment suitable for your oven temperature.
Make sure the tray is large enough to hold the potatoes in a single layer. If the potatoes are piled on top of one another, they are more likely to steam and turn soft.
Step 5: Season the Potatoes
Place the dry potato sticks in a bowl and sprinkle them with salt, paprika, garlic powder, or black pepper if desired.
Toss everything together so the seasonings are distributed evenly.
You don’t need oil for this step. However, remember that completely oil-free chips may have a slightly different texture from traditional deep-fried chips.
Step 6: Arrange and Bake
Spread the potato sticks across the prepared tray, leaving a little space between them.
Bake for approximately 30–40 minutes, turning the chips halfway through cooking.
Keep an eye on them during the final 10 minutes. Thin chips may cook faster, while thicker pieces may need additional time.
They’re ready when the edges look golden, the outside feels crisp, and the centers are tender.
Step 7: Let Them Rest Briefly
Remove the chips from the oven and let them rest for two or three minutes on the tray.
Taste one and add a little extra salt if needed. Serve them while they’re hot, because oil-free chips tend to lose their crispness as they cool.
Can You Make Crispy Chips Without Oil in an Air Fryer?
Absolutely! An air fryer is another excellent option because it circulates hot air around the potatoes.
- Prepare the potatoes by cutting, soaking, rinsing, and drying them thoroughly.
- Preheat the air fryer to 200°C (400°F), if your model recommends preheating.
- Place the potatoes in the basket in a single layer, working in batches if necessary.
- Cook for approximately 15–25 minutes, shaking the basket every 5 minutes.
- Check for tenderness and golden edges, adding a few more minutes if needed.
Cooking time depends on the thickness of the chips and the air fryer model. No oil is required, although the result may be less evenly browned than oil-coated chips.
My Best Tips for Extra-Crispy Homemade Chips
1. Pick the Right Potatoes
Floury potatoes, such as Russets, are generally a good choice because their higher starch content creates a fluffy interior.
2. Never Skip the Drying Step
If I could give just one tip, this would be it. Thoroughly dried potatoes have a much better chance of crisping than wet ones.
3. Don’t Overcrowd the Tray
Hot air needs room to circulate. Use two baking trays rather than stacking the potatoes if you’re preparing a large batch.
4. Turn Them Halfway Through
Turning the chips helps them cook more evenly, especially in a conventional oven where the heat may not be distributed perfectly.
5. Try a Short Pre-Cook for a Fluffier Center
For an extra-tender middle, simmer the potato sticks in water for about 4–5 minutes, then drain and dry them carefully before baking. Handle them gently so they don’t break apart.
6. Add Salt at the Right Time
You can season before cooking, but adding some salt after baking helps the seasoning stand out. For a lower-sodium version, use less salt and more herbs or spices.
7. Serve Immediately
Oil-free chips are at their best straight from the oven or air fryer. As they cool, moisture from inside the potato moves toward the surface, softening the crust.
Serving Suggestions
These crispy homemade chips are delicious on their own, but they’re even better with a few simple extras.
- With homemade burgers: Serve alongside a juicy beef, chicken, or veggie burger.
- With sandwiches and wraps: A crunchy side dish makes an everyday lunch feel special.
- With yogurt dip: Mix plain yogurt with garlic, lemon juice, and fresh herbs.
- With tomato ketchup: A classic pairing that never gets old.
- With spicy seasoning: Toss the cooked chips with paprika, chili powder, and a pinch of black pepper.
- As part of a family dinner: Serve with grilled chicken, baked fish, or roasted vegetables.
For a simple snack platter, I usually add a small bowl of ketchup, some cucumber sticks, and a yogurt dip. It’s easy, colorful, and perfect for sharing.
Approximate Nutrition Information
The following estimates are for one serving, assuming the recipe makes three servings from 500 g of raw potatoes and uses no added oil.
| Nutrient | Approximate amount per serving |
|---|---|
| Calories | 145 kcal |
| Carbohydrates | 33 g |
| Protein | 4 g |
| Fat | 0.2 g |
| Fiber | 4 g |
| Sodium | Varies with added salt |
These figures are estimates, not laboratory measurements. Actual nutrition values vary according to the potato variety, portion size, cooking method, and amount of salt used.
Important: Oil-free doesn’t automatically mean calorie-free or nutritionally superior in every respect. Potatoes still contain carbohydrates and calories, but leaving out added oil substantially reduces the fat added during cooking.
Frequently Asked Questions
1. How do I make potato chips crispy without oil?
The key is to soak the cut potatoes in cold water, dry them thoroughly, and cook them at a high temperature without overcrowding the tray. Turning them halfway through also helps them brown more evenly.
2. Why are my oil-free chips soft instead of crispy?
The most common reasons are excess moisture, overcrowding, low oven temperature, or insufficient cooking time. Make sure the potatoes are completely dry and spread them out in a single layer.
3. Can I make these chips without peeling the potatoes?
Yes! You can leave the skins on if you prefer a more rustic texture. Just scrub the potatoes thoroughly under running water before cutting them.
4. Can I prepare the potatoes ahead of time?
Yes. You can cut the potatoes and keep them submerged in cold water in the refrigerator for several hours. Before cooking, drain them, rinse if needed, and dry them very thoroughly.
For the best texture, cook them shortly before serving rather than baking them far in advance.
5. Are oil-free chips healthier than deep-fried chips?
They can be a lower-fat alternative because no cooking oil is added. However, the overall nutritional value depends on portion size, seasonings, and what you serve alongside them. Baking or air-frying also won’t make potatoes completely calorie-free.
Final Thoughts
Making delicious crispy chips without a drop of oil is all about a few simple details: choosing the right potatoes, soaking away excess starch, drying them well, and giving them enough room to cook.
I usually find that taking a little extra time with the preparation makes the biggest difference. You don’t need fancy equipment or a long list of ingredients to enjoy a plate of homemade chips with golden edges and a soft center.
Give this easy recipe a try the next time you’re craving chips, and experiment with your favorite seasonings until you find your perfect combination.